
KT Tape for Hip Flexor Pain: How to Tape It, and When Tape Isn't Enough
A practical guide from the physical therapists at Black Rock Physical Therapy in Grantsville, Utah.
Quick Answer
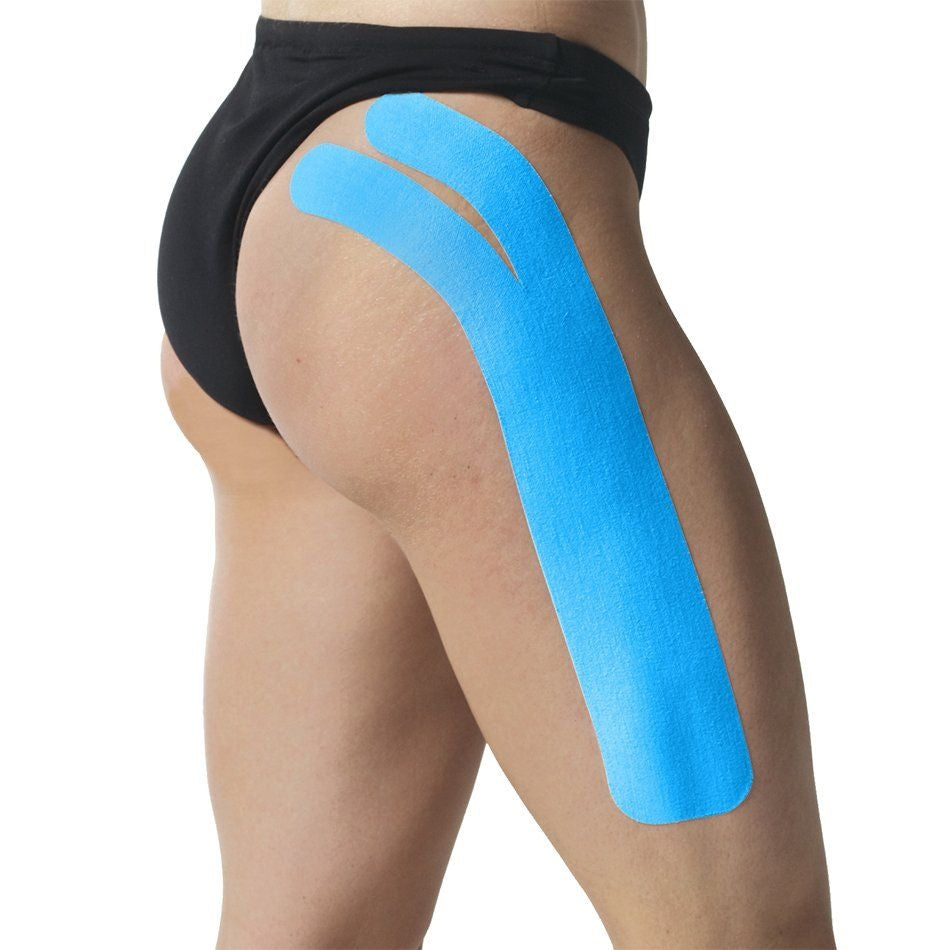
To use KT Tape for hip flexor pain, anchor one strip low on the front of the thigh with the hip extended, then lay the tape upward toward the front of the hip with light stretch — usually 15–25% — and rub it in for 30 seconds before you move. Add a second strip crossing the sorest point if you need more support. Applied correctly, the tape doesn't restrict your stride; it gives the muscle a constant cue and takes some of the pull off an irritated hip flexor.
That's the short version. Below is how to do it properly, why it works, and — the part most articles skip — how to tell whether hip pain is actually coming from your hip flexors at all.
What Your Hip Flexors Actually Are
Your hip flexor muscles are the group at the front of your hip that lifts your knee toward your chest: primarily the psoas and iliacus (together, the iliopsoas), plus rectus femoris, which crosses both the hip and the knee joint, and a few smaller contributors.
They work every stride you take. They also spend most of the day shortened if you sit — which is why desk workers and long commuters get hip flexor pain without ever doing anything athletic to earn it.
A hip flexor strain happens when that muscle group is loaded faster or harder than it's ready for: a sprint, a hill, a heavy kick, a slip. A flexor strain typically shows up as a sharp, pinpoint ache deep in the front crease of the hip that's worse when you lift your knee or push off. Chronic flexor pain, by contrast, is more of a dull, deep front-of-hip tightness that never fully clears.
Does KT Tape Work for Hip Flexor Pain?
Honest answer: KT Tape works best as an assist, not a fix.
The research on kinesiology tape is genuinely mixed on tissue-level effects. What it does reliably do is change sensation. The tape lifts the skin slightly and provides constant input to the nerves under it, which for many people means less perceived pain, better body awareness of the area, and more confidence loading it. Patients frequently report the hip simply feels more "gathered" — and that's not nothing, because moving normally is what actually drives healing.
What it will not do is repair a torn muscle, restore lost strength, or correct the mechanics that strained the hip flexor in the first place. Anyone selling tape as a cure is overselling it. Used alongside proper rehab — strength work, mobility, load management — it's a useful tool that helps you stay active while the real work happens.
How to Apply KT Tape for the Hip Flexor
What you need: two strips of kinesiology tape, roughly 8–10 inches each. Clean, dry, lotion-free skin. Ideally trim heavy hair over the application area — tape adheres to skin, not hair.
Open a step to see where that strip goes.
-
Stand and step the taped-side leg back into a shallow lunge so the front of the hip is stretched. This is the single most-missed step. If you tape a shortened hip flexor, the strip does almost nothing once you stand up.
-
Tear the backing a couple of inches from one end. Lay that anchor down with zero stretch, low on the front of the thigh, several inches above the kneecap. Every anchor goes on unstretched — that's what keeps the ends from peeling.
-
Peel the backing progressively and lay the tape upward along the front of the thigh toward the front of the hip, applying 15–25% stretch through the middle. That's a light pull — think "gentle," not "yank." This is where easy kinesiology tape lifts the skin and does its work.
-
Last two inches down with zero stretch at the hip crease.
-
Lay it diagonally across the most tender spot, again with light tension in the middle and unstretched ends, forming an X over the sore area.
-
Rub the whole application briskly for 20–30 seconds. The glue is heat-activated. Skipping this is the #1 reason tape lifts in an hour.
-
Give it 30–60 minutes before sweating, showering, or training.
Worn correctly, a hip flexor taping technique like this lasts 3–5 days through showers and workouts.
Tape Tips Most People Learn the Hard Way
- Round the corners of every strip. Square corners catch on clothing and peel.
- Never stretch the ends. Stretched anchors pull on skin and cause irritation and early lift.
- Less tension than you think. More stretch is not more support — it's more skin irritation.
- Don't tape over broken, sunburned, or infected skin.
- Itching, burning, or a rash means take it off. For reactive skin, look for a sensitive skin gentle formulation with a milder adhesive.
- Remove it slowly, in the direction of hair growth, in the shower with the tape wet. Ripping it off is unnecessary.
- If pain increases with the tape on, the placement is wrong — or the problem isn't the hip flexor.
- Watch a few applications before your first try. Tutorials on YouTube, brand sites, and the KT Tape forum are useful, though keep in mind those demonstrations are filmed on healthy models for demonstration purposes and won't account for your specific injury.
Other Hip Pain Applications
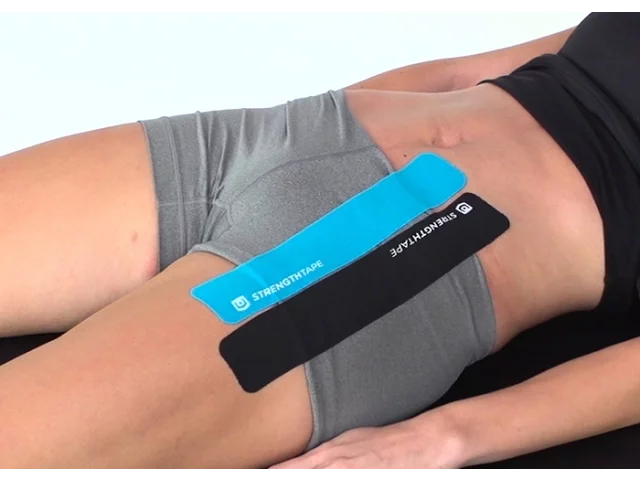
The hip flexor is one of several hip pain applications where kinesiology taping helps:
- Hip bursitis and lateral hip painstrips framing the greater trochanter to offload the irritated bursa
- Glute and hip joint stabilitya fan pattern supporting the posterior hip during walking and running
- Groin and adductor straina spiral up the inner thigh
- General hip pain and post-activity sorenessbroad decompression strips over the sorest region
- IT band and lateral thigh tensiona long strip down the outside of the thigh
For deep joint stability demands — late-stage return to sport, for instance — rigid athletic tape is sometimes the better choice, since kinesiology tape is designed to move with you rather than lock a joint down. We'll tell you which one your situation actually calls for.
Taping Isn't Just for Hips
The same principles apply almost anywhere. In clinic we regularly tape for:
- Knee pain, including lateral knee pain, patellar tracking, and proper inner knee taping for MCL and pes anserine irritation
- Shoulder pain — rotator cuff support and postural cueing
- Lower back pain — paraspinal decompression strips
- Shin splints pain and peroneal tendonitis — lower leg support for runners
- Quads pain and hamstring pain — strain support and recovery from a muscle strain
- Ankle sprains, plantar fascia, elbow tendinopathy, and wrist support
Advanced taping techniques — decompression cuts, fan and web patterns, star and lymphatic applications — are where a trained clinician's eye matters most, and they're difficult to self-apply well.
Products We Keep in Clinic
We stay brand-agnostic and use what performs. Among KT Tape products, we carry [SPECIFY: KT Tape Pro synthetic, Original cotton, Pro Extreme, and the sensitive-skin option], and we've had good results with other elastic therapeutic tapes as well, including Flexu kinesiology tape and Kinesio Tex.
Beyond tape itself, the featured products patients ask us about most are the adhesive-patch categories — menthol pain relief patches, the recovery patch style products, and skin-safe adhesive covers like an insulin pump patch or CGM cover for patients who need one to stay put through training. Some help; some are mostly marketing. Ask us and we'll give you a straight opinion rather than a sales pitch. [VERIFY what the clinic actually stocks and sells before publishing this section.]
When Hip Pain Needs More Than Tape
Tape buys you comfort. It doesn't answer the question of why.
A great deal of what gets self-diagnosed as a tight hip flexor turns out to be something else: a labral tear, femoroacetabular impingement, hip bursitis, a referral pattern from the lower back, or — most commonly — weak glutes forcing the hip flexors to do work they were never designed to do. Tape the symptom in those cases and you'll be taping it again next month.
See a physical therapist if any of these apply:
- Pain lasting more than 2–3 weeks despite rest
- Sharp, catching, or clicking sensations in the hip
- Pain that wakes you at night
- Visible bruising or a pop at the moment of injury
- Weakness, giving way, or a limp
- The same strain keeps returning to the same spot
At Black Rock Physical Therapy, an evaluation tells you what's actually driving it. We assess strength, mobility, and how you move, then build a plan around it: hands-on manual therapy, targeted strengthening for the deep hip and glutes, mobility work, gait and running assessment, and yes — taping where it genuinely adds value. We'll also teach you to apply it yourself so you're not driving in every three days.
Our clinicians work in the same territory as sports physical therapy, massage therapists, and athletic trainers when it comes to soft tissue care — but the goal is always the same: get the tissue healthy enough that you don't need the tape.
FAQs About KT Tape and Hip Flexor Pain
Three to five days is typical. Remove it sooner if you get itching, burning, or redness.
Yes. Pat dry — don't rub — and let the edges air dry.
About 15–25% through the middle of the strip, with unstretched anchors at both ends. Muscle-support applications use light tension; more is not better.
For a mild hip flexor strain, tape can help you move more comfortably within a day or two. For anything with bruising, a pop, or real weakness, get it evaluated before you tape over it.
The evidence is mixed on mechanical effects and stronger on pain perception and confidence in movement. It's a legitimate adjunct — just not a standalone treatment.
No. Strength, mobility, and load management fix hip flexors. Tape makes the interim more comfortable so you can do that work.
Keep kinesiology tape off the device site itself; use a purpose-made insulin pump patch or sensor cover there instead.
Get It Assessed
If your hip has been bothering you for more than a few weeks, tape is a reasonable stopgap — but it's worth knowing what you're taping over.
Black Rock Physical Therapy serves Tooele, Stansbury Park, Lake Point, Erda, Stockton, and Grantsville. An evaluation will tell you exactly what's driving the pain and what it takes to resolve it.
Request an Appointment · Call (435) 884-0324 · 163 UT-112 #101, Grantsville, UT 84029